
Bambu Labs has been shaking up the 3D printing community with its line of shockingly-fast Core XY printers. The P1P is the latest entry, a no frills version of the $1449 X1-Carbon that dumped everything from a touch screen and lidar sensors to the side panels themselves in order to produce a more affordable model. The result is a skeletal husk of a printer that's blazing fast.
Retailing at $699, the P1P is still a good chunk of change and for good reason. It retains premium features like auto bed leveling, input shaping, a PEI coated flex plate, linear rails and a self-cleaning tool head. The unit is also compatible with Bambu Lab’s $349 four-color AMS unit for multicolor prints and can be upgraded with a chamber monitoring camera and light.
This is the first printer I’ve seen that’s offered customizable panels for the customer to print themselves. It’s a genius idea considering the level of creativity among 3D printing enthusiasts and our craving to upgrade every printer we get our hands on.
The P1P is capable of hitting 500mm/s print speeds with an eye-popping 20,000 mm/s acceleration speed. This makes it twice as fast as the AnkerMake M5, and a welcome addition to our list of the best 3D printers.
Specifications: Bambu Lab P1P
| Machine Footprint | 386 x 389 x 458 mm (15.2 x 15.3 x 18 inches) |
| Build Volume | 256 x 256 x 256 mm (10 x 10 x 10 inches) |
| Material | PLA/TPU/ABS/PC (up to 300 degrees) |
| Extruder | Direct drive |
| Bed Leveling | Automatic |
| Filament Runout Sensor | Yes |
| Nozzle | .4mm proprietary |
| Build Platform | PEI textured spring steel sheet, heated |
| Connectivity | microSD card, WiFi, Bluetooth |
| Interface | LED screen with knob |
| Machine Weight | 9.65 KG (21.2 lbs) |
Bambu Lab P1P: Included in the Box

The Bambu Lab P1P comes with everything you need to get your printer set up, as well as a few extra parts. You get tools to maintain the printer, a spare hotend, two spare nozzle wiping pads, and a microSD card. There’s also a full sized roll of white PLA and screws to attach the DIY side panels should you wish to print them.
The microSD card contains test models, as well as a few tools like a scraper.
The printer comes with a paper getting started guide and instructions on how to access the slicer and phone app.
Our test unit included the same early bird bonuses that are currently available for the first batch of customers. This includes a timelapse camera for the chamber, an interior light and a secondary cooling fan. The cooling fan was not installed for the test prints, as it is an extra purchase for ordinary customers.
Design of the Bambu Lab P1P

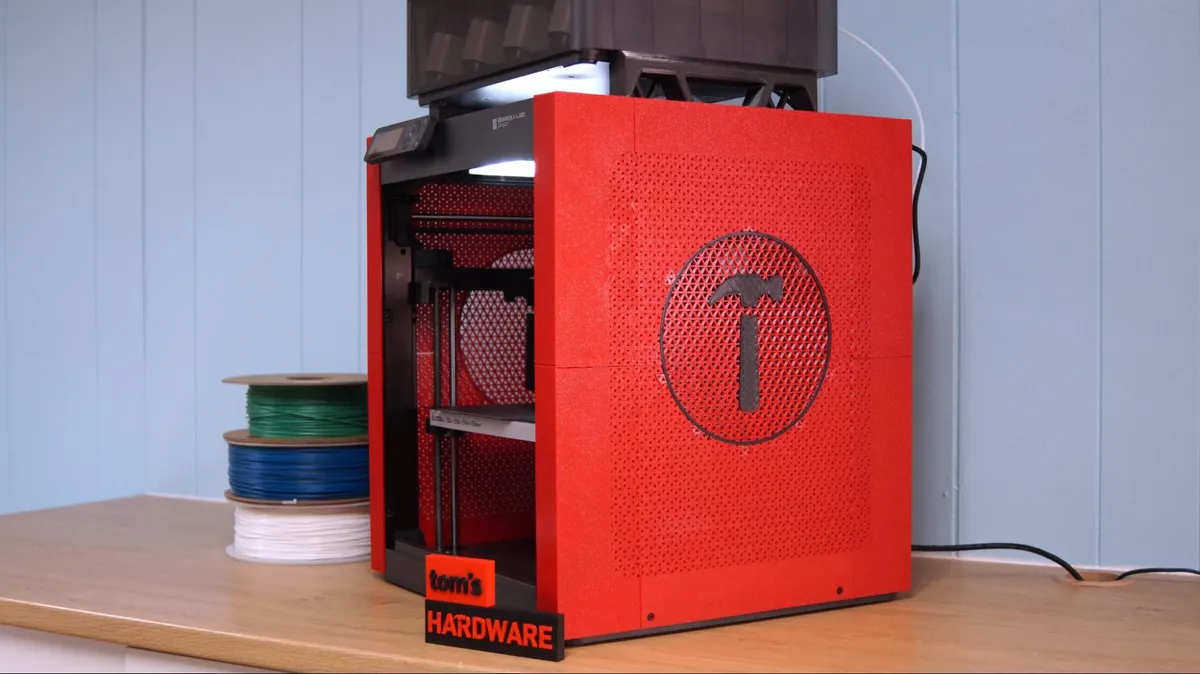
The P1P is literally a stripped down version of Bambu Lab’s deluxe X1-Carbon 3D printer. The first thing I noticed was that the printer looked shockingly naked. This is actually on purpose – the user is meant to print their own custom cover panels and screw them into place. Several designs are available online from Bambu Lab and I’m sure more will be available from independent designers. Our test printer is fitted with custom panels kindly designed by Bambu Lab and printed here in PETG, taking about 40 hours of total print time.
The P1P is a true Core XY printer, something we don’t see very often at the hobby level. Like the Creality Ender 5 S1, the bed moves up and down on the Z axis. Unlike the Ender, which is a Cartesian style printer, the P1P uses a combination of belts to move the X and Y axis in tandem for smoother, faster printing.
The proprietary auto bed leveling system is wondrous, not only making sure the hard mounted print surface is flat, but at the perfect Z height. There is, in fact, no way or need to adjust the z height. I don’t know what they’re using, but this probably explains the need for a proprietary hotend.
Which brings me to spare parts. The P1P comes equipped with an all-metal hotend and long-lasting .4mm stainless steel nozzle. The nozzle is not replaceable, rather you’ll need to swap out the entire hotend. And if you want to use a .6mm or .8mm nozzle, you’ll need to buy the entire hotend with that nozzle. Fortunately, these are reasonably priced at $9.99 for stainless steel and $14.99 for hardened steel. The hotends should be easy to swap as the fan cover is held in place with magnets.
All of Bambu Lab’s printer parts are custom and need to be purchased directly from Bambu Lab. The web store seems to cover every part, from thermistors to belts, so at least customers are not left wondering if 3rd party parts will fit.
We should note here that P1P is compatible with the X1-Carbon’s four-color Automatic Material system. As the two printers share the same slicer, there is nothing special you need to do to mount the system beyond printing a set of brackets.
Other parts are not compatible with upgrades, such as the Lidar sensor, high quality camera or large touchpad from the more expensive X1 series.
One thing I found less than stellar was the spool holder, which feels like an afterthought. The holder is mounted on the back – a horrible spot – and looks like a shelf bracket. I’m convinced the engineering team thought everyone would want the AMS unit and whipped up a single spool holder at the 11th hour.
Another oddity is the waste chute located in the back of the machine. Even without an AMS unit, the P1P will purge filament from the system before starting a print. Rather than leaving a pile on your build plate, Bambu printers drop their waste over a chute in the back of the machine, which plops it on the table – or the floor if the printer is close to the edge.
YouTubers immediately dubbed this the “poop chute” and innovative designers have created dozens of boxes to more conveniently collect the droppings. I’m rather surprised with all the engineering put into this machine that it was allowed to create such a mess.

When the P1P does have an error – even the best printers can choke – it tries to help you diagnose the problem by issuing an error code. The code will appear on the printer’s screen as a long scroll of unhelpful numbers. But the error code will also appear on the phone app and the device tab on your computer. These codes are links to the Bambu Wiki, a knowledge base for operating any Bambu printer. The Wiki will help you identify and fix the problem, often with quick video tutorials.
Bambu Lab Automatic Material System (AMS)
One of the major advantages of the P1P is its compatibility with Bambu Lab’s AMS system – a four color spool feeder that unlocks the ability to print in four, eight, twelve and even sixteen colors. The units cost $349 each and can be mounted on top or next to the printer.
The Bambu Lab slicer is all you need to digitally paint your models with color. I did a sample print using Bugman140’s Clyde, a single color horse. Using the paint bucket and layer tools I was able to quickly turn the solid colored horse into a buckskin with one white sock, after a horse I befriended in Girl Scouts. The resulting color print was amazing without any bleeding between colors.

There are two drawbacks to using the AMS. First, the printer wastes an astounding amount of material when it cleans out the nozzle between colors. This amount can be reduced with tuning, but will take time and patience. The slicer will tell you exactly how much it will use before you start a print. For this horse it took 77.5 grams of filament (38 brown, 37 black, and 2.5 white) to print the horse. It “flushed” 135 grams. Tuning reduced that amount to 80.5 grams wasted, though perhaps more could be saved with further experimentation.
The second drawback is loss of speed. The printer needs to pause between layers to purge filament into the “poop chute” then do a nozzle wipe on the purge tower. This model took 10 hours and 28 minutes to print in three colors at standard 200mm/s speed. As a single color it would only take 1 hour and 25 minutes. For comparison, the horse prints in 3 hours and 10 minutes at 65mm/s on an Anycubic Kobra.

Those who sell prints have discovered that printing many copies at once greatly reduces wasted time and filament. After all, the machine changes color each layer, not each model. If you print a dozen Clydes, waste is reduced to 31 grams as it has more infill and supports to spread out the color change. Time is increased to 27 hours, just a bit more than double the time spent printing one model.

Bambu Lab P1P Speed Settings

The P1P has the highly unusual equivalent of a turbo button. Once a print is sent, you have the option of bumping it up from standard to “sport” or “ludicrous” speed, which is 124% and 164% respectively. There’s also a silent mode at half speed. This may be compensation for the complicated slicer, and allows a user to stick to the presets and slap the ludicrous button for faster results.
So how does the P1P compare to other printers in the speed and quality department? We’ve tested a number of speedy printers around here, so we gave each of our fastest printers a Cali-Dragon with the similar quality settings, with each running at its own recommended top speed and acceleration. I also ran the same print on an Anycubic Kobra Neo for comparison.
Since speed alone is worthless without quality, each slicer was set to a .2 mm layer height, 3 walls, 4 top and bottom layers and a 15% cubic infill. The following photo shows each printers best sample at speed.

Speed Comparisons
Anycubic Kobra Neo: 65mm/s 50 minutes
Ender 3 S1 Pro with Klipper: 150mm/s 29 minutes
Anker M5: 250mm/s 25 min
FLSun V400: 300mm/s 25 minutes
Bambu P1P: 300mm/s + Ludicrous Mode 18 minutes
Assembling the Bambu Lab P1P

The Bambu Lab P1P comes mostly assembled and only needs to be unpacked. You then attach the reverse Bowden tube, spool holder and control screen. The printed guide walks you through each step.
Leveling the Bambu Lab P1P
The Bambu Lab P1P has unmatched auto leveling combined with vibration compensation, pressure advance and semi-automatic belt tensioning. A thorough self test is run after unpacking the machine to make sure everything is in working order.
Once you’re up and running the machine will automatically run a bed leveling check before each print. This takes about 6 minutes, but you’re free to uncheck the option if you don’t want to take the time.
There is no need to set the z height or z offset. In fact, there’s no option or button to do so, because the P1P handles this setting on its own.
Loading Filament on the Bambu Lab P1P

For all its advanced features, loading filament without an AMS unit seems comparatively ponderous. The control screen is a little confusing to follow since the screen is so tiny and so jammed full of cryptic symbols. First heat up the hotend (click the down arrow with waves) then load the filament through the reverse Bowden tube until it stops at the hot end. Then you push the advance filament button (the arrows and with an E) several times until it comes out of the nozzle.
To unload or change colors, there is an unload option that handles everything.
If you opt for an AMS unit, filament loading and unloading is handled by the machine. You only push filament 2 cm into the feeder and it automatically slurps it into the system.
Preparing Files / Software for Bambu Lab P1P

The Bambu Lab P1P has its own proprietary slicer suite, which is largely based on PrusaSlicer. The slicer should feel very familiar to Prusa fans, though as a Cura user myself there was a bit of a learning curve. Fortunately, there are presets for all types of filament that work very well. I only tweaked settings to make stronger parts for a Voron build I’m working on.
Bambu slicer will work with other printers and has a preset for a Creality Ender 3 V2 (which could be modified for most Cartesian style printers) and settings for the Voron 2.4, Trident and Voron 0.1.
The slicer suite is also where you program the AMS unit should you have one. You can “paint” color onto your models even if they were not designed for multicolor prints.
The device tab is where you can send files via Wifi, watch video from your camera’s timelapse and remotely tweak the speed and temperature of your printer.
You can also save complex builds in the project manager, which will then create a single 3mf file you can share. This file can include several plates of build parts, photos and a bill of materials.
Printing on the Bambu Lab P1P
The P1P comes with a full roll of white Bambu Lab filament. Each spool of filament comes with an RFID ID tag that the multi-material AMS can read. If you don’t have the AMS unit you’ll have to tell the slicer what filament you’re using. Bambu Lab sells quality filament in a basic range of colors in PLA, ABS, TPU, Carbon Fiber Nylon and PC. I received samples of PLA, TPU and a soon-to-be released Carbon Fiber PLA. If you want silks and multicolor filaments, you should check out our guide to the best filaments for 3D printing for suggestions.
Inland’s Blue/Green Silk PLA from MicroCenter was flawless using presets for generic PLA. This large headphone stand ran for 11 hours and 57 minutes at 300mm/s standard speed. For comparison, an Ender 3 S1 Pro needs 40 hours at 150mm/s to complete the same print.

To test PETG, I printed the P1P’s side panels in IC3D Recycled PETG in Red and Black. The machine didn’t even slow down when loaded up with PETG and the prints – all 15 of them – ran without a problem. This project took 40 hours total to print, with each piece covering most of the bed.
ABS is not a sure fire material for the P1P since it is not an enclosed printer. However, it did a decent job on the skirt and legs of this Voron I’m printing – I blocked the front of the printer with a large piece of cardboard, making it partially enclosed. The printer was able to get to 30C in the chamber. Two skirts were printed at a standard 300mm/s speed with 4 walls and 40% infill and it took 58 minutes.

Bambu Lab sent a sample of Carbon Fiber PLA, a new material soon to be offered in its store. This was really fun to print with as the results are impeccably smooth without a hint of ringing inside to mar the print in place lever.

The P1P handles TPU ok at speed, with a few lumps and stringing. I ran this print in silent mode, but still need to play with the settings a bit more to see if all the bumps can be removed. I used Bambu’s own TPU 95A for the test, as well as it’s preset in Bambu Slicer, which slowed the “volumetric speed” from 21 mm³/s to 6.4 mm³/s, which represents how fast the filament melts. This print ran in Silent Mode, taking just 57 minutes to complete.

Thermal Runaway Protection
It has recently come to our attention that Bambu Lab has installed thermal runaway protection on its machines that is slower to react than industry standards. The company issued a response explaining its safety measures, and plans to shorten the three minute delay between thermistor failure and power cutoff (presumably via a firmware update).
Currently, the P1P has both hardware and software protections to prevent a fire should the printer's thermistor fail (aka thermal runaway). If the thermistor is disconnected the machine will sound an alarm and cut power within 5 seconds. However, in the event of an abnormal reading -- such as over heating -- there is a three-minute delay before the machine turns off. Bambu Lab said this delay was set to prevent false readings while maintenance is being performed on the hotend.
Bottom Line
The Bambu Lab P1P has been called a Voron – an incredibly fast handbuilt printer – for people who don’t have the time or skill set to build one, and they're not wrong. It is the fastest printer I’ve tested, and its ability to perform input shaping allows it to produce crisply detailed prints at high speed. It’s a steal at $699 and I would highly recommend it if it’s in your budget.
Though it took an extra 40 hours of printing to get my machine fully dressed, being able to change its look is a real perk for those of us who like our printers to be camera ready. The covering is just for show, as printing ABS was still a bit of a struggle even with the help of some extra cardboard. This machine should always be considered an open frame model mostly for PLA and other hobby level materials.
The ability to add a fully compatible multicolor unit to this machine at half the price of an independent setup is also very tempting for people itching to print in color.
If the P1P isn’t in your budget, but you still want a hassle-free printing experience, check out the $230 Neptune 3 Pro which has all the features you need for quality prints. If you’re interested in a fast Delta printer with a large build area that’s also ridiculously fun to watch, check out the Klipper’d FLSun V400, currently on presale for $849.
MORE: Best 3D Printers
MORE: Best Resin 3D Printers


